Project goal
The goal of this personal project was to build a financial tracking app from scratch. I wanted to build a functional and smooth running full-stack application to help track income, expenses, savings, and debt. An user should only have to set it up once, create a new month when salary comes in and enter their transactions; the app keeps track, distributes savings towards targets, provides overview and creates analytics.
This gave me the opportunity to get the full-stack experience of starting from a blank canvas to a live application in production on my own domain. The frontend is build in React. React's component-based architecture made UI development very efficient. This phase reinforced JavaScript fundamentals and introduced React state management.
The backend and database are created using NestJS. Setting up a backend and database taught me how to set up APIs, how to handle user authentication, and the basics of server-side logic. This was crucial for building a scalable application.
While building all the apps features I learned how to break complex features into smaller tasks while on a strict timeline. This way I improved the ability to tie backend data to frontend functionality.
With the core functionality finished it was time for testing and security implementations, such as authentication guards, CSP and rate limiting. Testing and security is essential for a seamless user experience. Overall a great learning experience!
Skills and Knowledge Gained/Improved:
-
Frontend Development:
- Proficiency in React, including hooks, state management, and component composition.
- Improved ability to create dynamic, user-friendly interfaces.
-
Backend Development:
- Hands-on experience with NestJS for building scalable APIs.
- Understanding database operations, user authentication, and data security.
-
Full-Stack Integration:
- Learned how to connect frontend and backend systems effectively.
- Gained experience in debugging and testing full-stack applications.
-
Problem-Solving:
- Developed resilience and a step-by-step approach to tackling technical challenges.
- Improved debugging strategies and testing workflows.
-
Project Management:
- Learned how to plan and break tasks into manageable pieces.
- Gained insight into balancing feature development with time constraints.
Documentation
This documentation explains the apps functionalities and can be used as an user guide. The app is designed to be used on desktop/laptop. The screenshots show the app in dark-mode. When you first visit the app it will be shown in light-mode. After login/register you can navigate to your account page and switch to dark-mode.
Login & Register page
The login and register pages are quite straightforward. Clear and simple design. As mentioned the backend server goes to 'sleep' after inactivity for 15minutes. This is because i'm currently using Render's free tier hosting for the backend, which includes this feature on the free plan. After the first request is send, the server is quick and reliable.


Homepage
After login you are redirected to the homepage. Here you can use the navigation bar in the header to navigate or use the tiles to navigate to where you need to go. If you're a first time user you should move to the setup page to start setting up your finances.

Monthly Summary
After you've configured the setup page you can navigate to the MonthlySummary page. Here you can add a new month. Every month when Salary is paid the user should start a new month on the Monthly Summary page. Each month shows the categories from the setup page and shows the expected amount per month. Next to this column is an actual amount shown, that at first will be 0. Once you start adding transactions, more about that later, you will see an actual amount. If this is shown in red it means you've exceeded the expected amount.

Analytics
Once you start adding transactions the Analytics page will start to gather information and show useful data. At first you have an overview of the monthly balances. This is, hopefully, an upwards graph showing you how you grow each month.
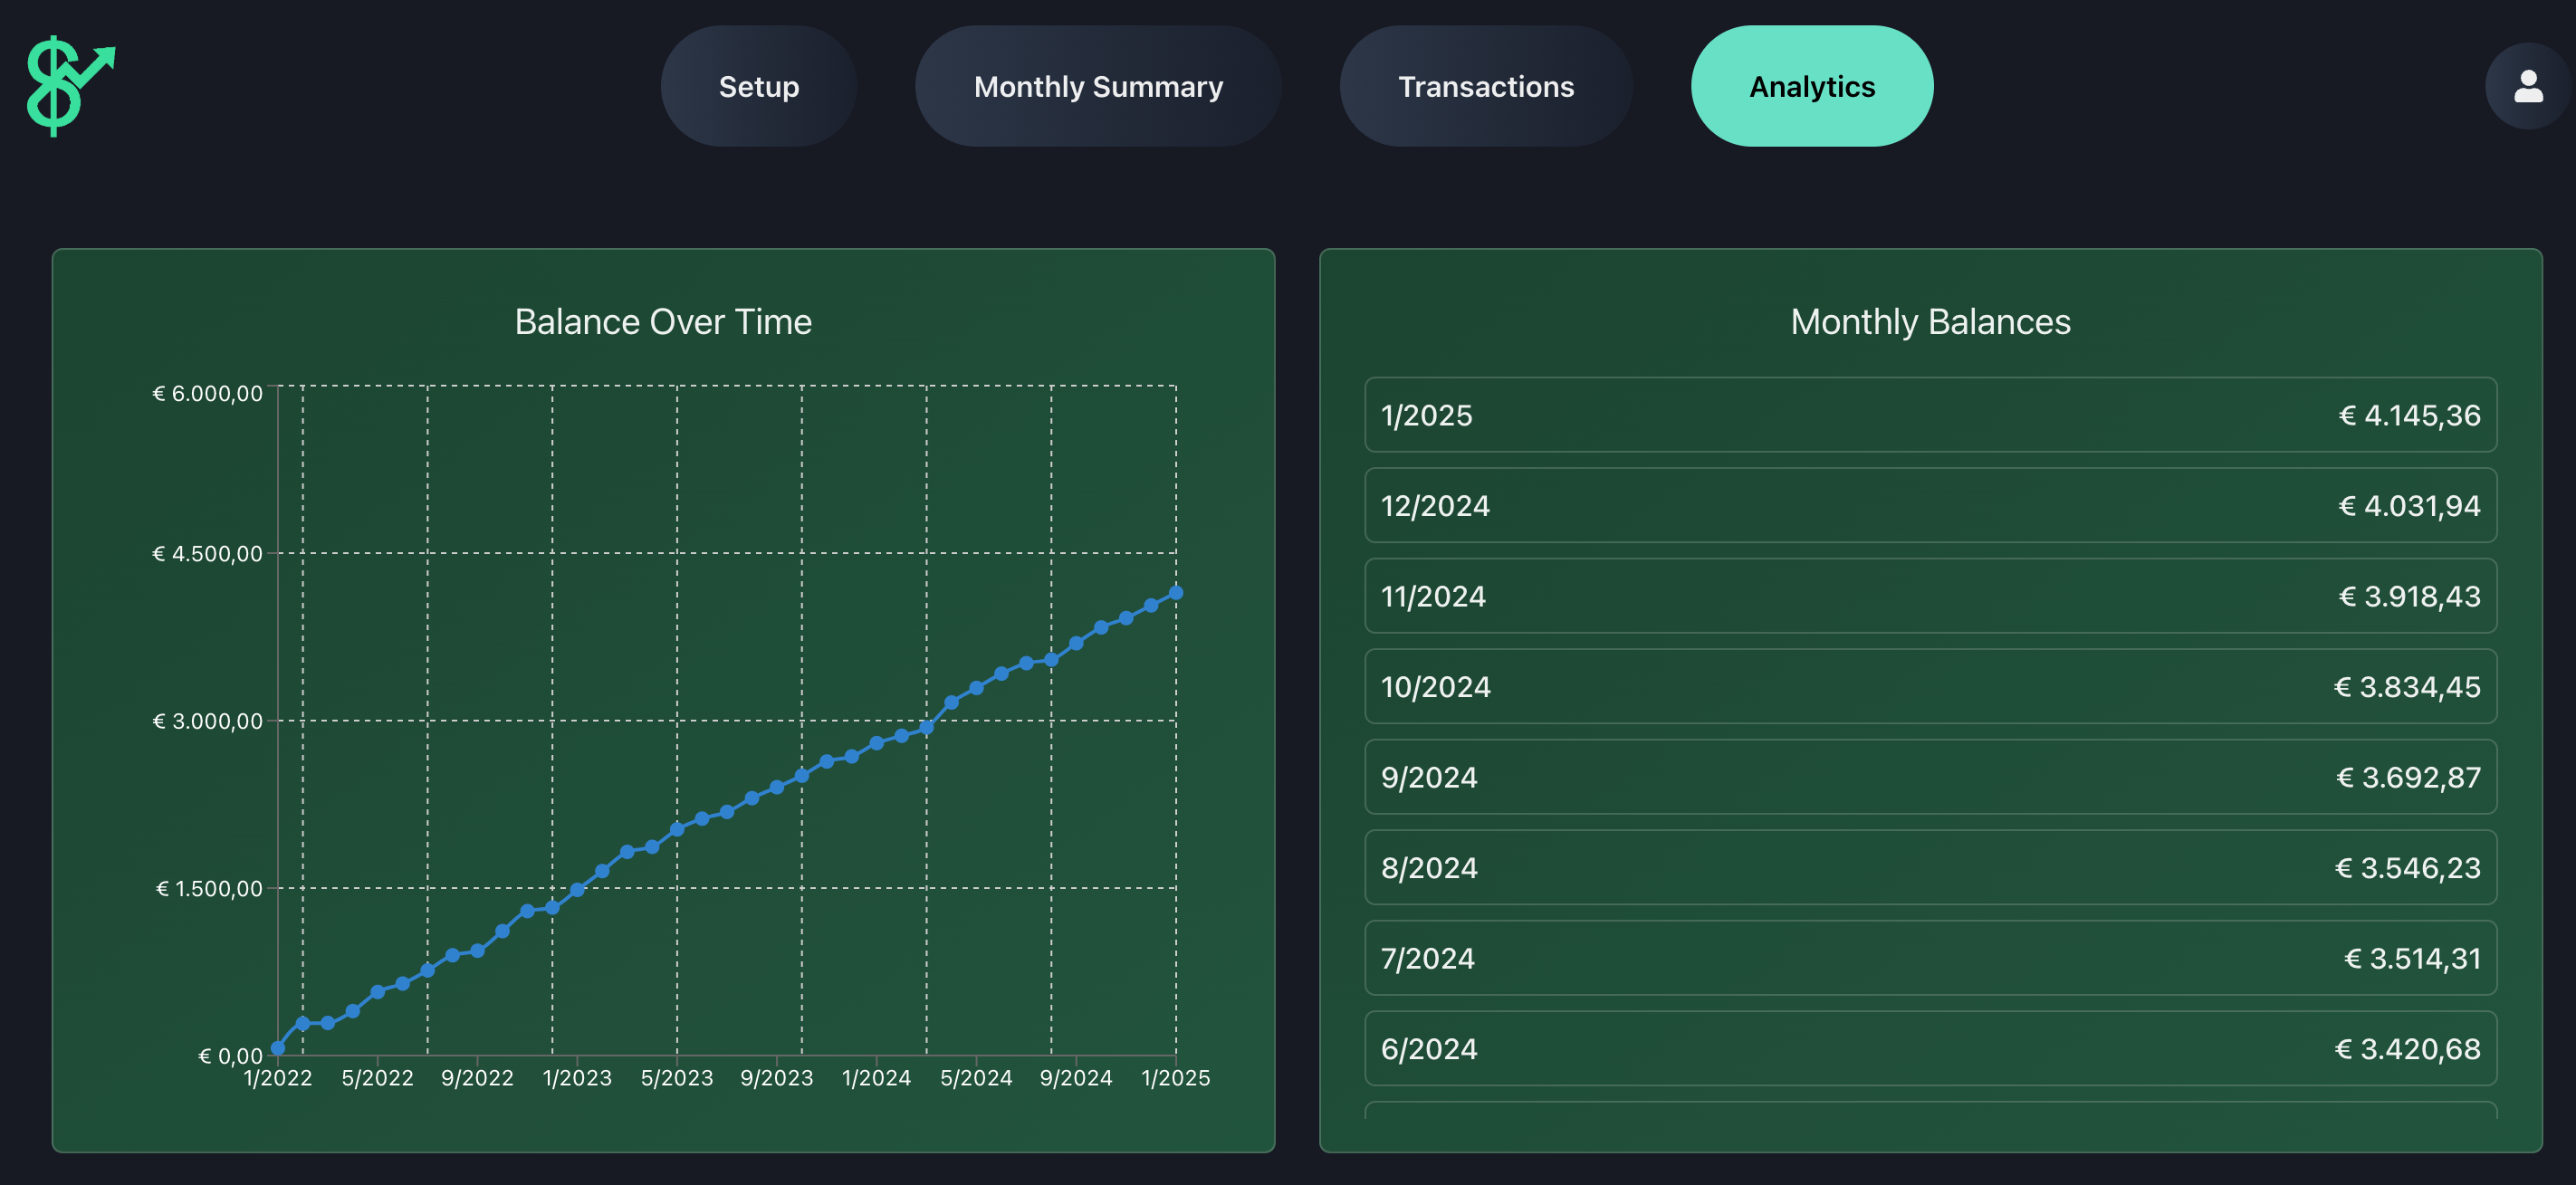
After the balances you can see the overspent months and categories. Here you can see an overview of which categories you overspent on, this should explain why you possibly overspent in the month. This should show the areas of concern and allows you the adjust the expected amount or adjust spending.

Then we can see the savings targets that have been set up. You can see the amount that's in each savings target and the movements/transactions. If you need to move money from one target to another, or make a withdrawal from a target you can use the + modal.

If you've added debts and you are paying them off there will also be a debt section on the analytics page, giving an overview of the payments and a graph showing the progress paying the debt off.

Setup
The setup page offers you to set up all income, expense, savings and debts. There are fixed expenses, such as subscriptions, and expected expenses, such as groceries. For savings you can set up different savings targets per year. There is also an option to set up existing debts and enter the monthly payments if the debt is being paid off. Once everything is set up the Summary tab will show a nice overview of the expected amounts and shows a balance.

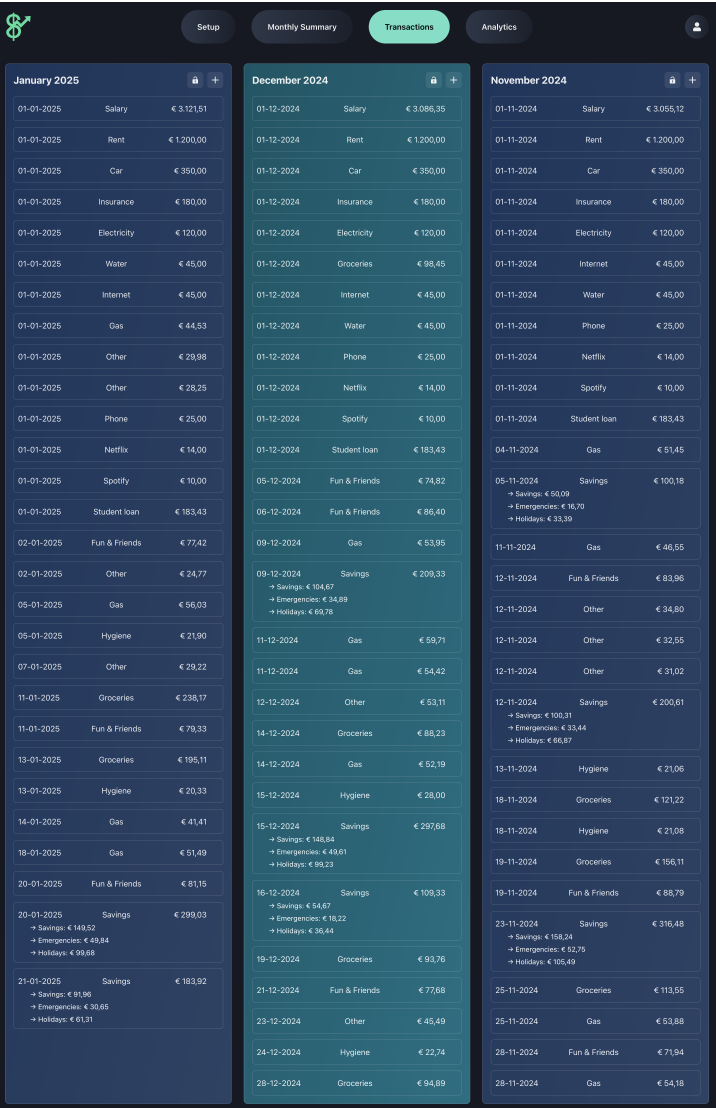
Transactions
After creating the month on Monthly Summary you can start adding transactions to this month. Months that are created are automatically shown in the Transactions page. You can add the transactions here and the app will automatically keep track of your expenses and income. Overviews of the totals can be seen if you go to the Monthly Summary page. A savings transactions is automatically distributed over the savings targets. Every savings transaction will distribute the amount over the savings targets to make sure at the end of the year they meet their expected amount.
Account page
The account page offers the option to change first and last name. You can also change your password here. You can also find settings for dark-mode. At last you'll find the option to delete your account if you no longer wish to use it.

If you have any questions, feedback, feature requests or any other inquiries please reach out to contact@obt-systems.com.